Texture painting in Blender is one of those things that sounds simple until you actually try it. If keyboard shortcuts trip you up too, the free Blender Shortcut Tool covers texture paint mode shortcuts. You open the texture paint workspace, stare at the UV editor, wonder why half your mesh is showing up wrong, and close Blender. Sound familiar? That is the experience for most beginners. Easy Texture Paint is an addon built specifically to get rid of that frustration.
It brings one-click UV setup, multiple paint modes, and ambient occlusion shadows all into one place. You do not need to manually unwrap, switch workspaces ten times, or figure out why your colors are bleeding. The addon handles the setup side of things so you can actually focus on painting.
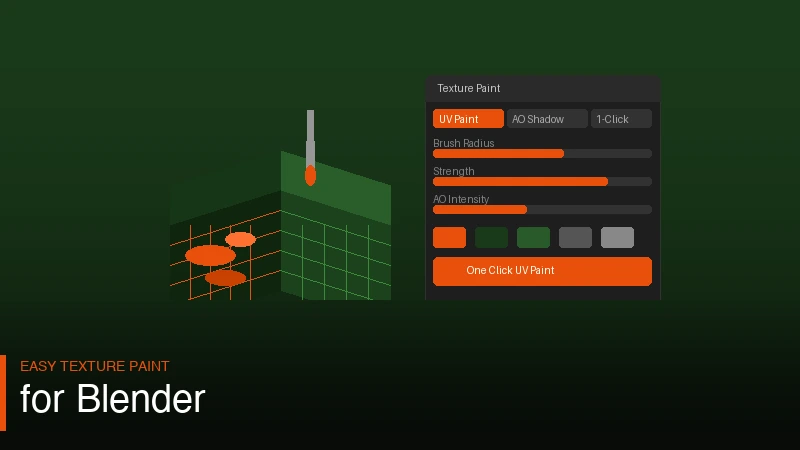
What the Addon Actually Does
The core feature is the one-click UV. Normally before you can paint anything you have to unwrap your mesh, set up image textures, and make sure everything is connected in the shader editor. For beginners that process alone kills the motivation. With Easy Texture Paint you click once and it handles all of that for you.
The multiple paint modes are where things get interesting. You can switch between different ways of applying paint to your surface without digging through menus. Whether you want flat color, blended transitions, or layered effects, you pick the mode and start painting. Simple as that.
The AO shadows feature adds baked ambient occlusion directly into your painted texture. So even without complex lighting setups your model gets that natural depth and shadowing that makes it look like it actually exists in a scene. For game assets, product renders, or stylized characters this is genuinely useful. If you are also managing a complex character rig, Shape Key Fixer pairs well with this addon.
Why It Works for Beginners
Most texture painting tutorials assume you already know UV unwrapping. They skip past the setup like it is nothing. But if you are new to Blender that setup is exactly where things fall apart. Easy Texture Paint removes that barrier. You get straight to painting your mesh without spending an hour watching tutorials about seams and UV islands.
The workflow feels much closer to how 2D painting tools work. You pick a color, pick a mode, and paint. The addon fills in the technical gaps behind the scenes. That kind of design is rare in Blender addons because most of them are built by people who already know Blender well and forget what it felt like to be new.
If you have been avoiding texture painting because the setup felt overwhelming, this is worth trying. It will not turn you into a pro texture artist overnight but it will get you actually painting instead of troubleshooting.
Where to Get It
The addon is available on both Superhive and Gumroad. Same product, different platforms. Grab it wherever you prefer.
Step-by-Step: Painting Your First Texture with Easy Texture Paint
Here is a practical walkthrough of how Easy Texture Paint changes the standard workflow for someone who has never texture painted in Blender before.
Start with any mesh object. It does not need to be unwrapped. Select the object, open the Easy Texture Paint panel (you will find it in the N-panel in the 3D viewport), and click One-Click UV Setup. The addon automatically unwraps your mesh using smart UV projection, creates a new image texture, assigns it to your material, and connects everything in the shader editor. What used to take 10 to 15 minutes of setup happens in under three seconds.
Switch to the Texture Paint workspace at the top of Blender. Your mesh is now ready to paint. Choose a paint mode from the Easy Texture Paint panel — try Solid Color first to get familiar with the brush controls. The brush size, strength, and color all work the same as Blender's built-in tools, but the setup overhead is already done for you.
Once you have some base colors down, switch to the AO Shadows mode. The addon bakes a quick ambient occlusion pass and blends it into your texture. You will immediately see the creases, corners, and recessed areas darken naturally. On a character face this gives you the impression of depth under the cheekbones, around the eyes, and in the nasolabial folds without any manual painting or light setup. Save your image texture from the UV editor (Image > Save) and you are done.
Texture Painting Tips for Cleaner Results
Even with the setup handled automatically, a few techniques will make your painted textures look significantly better.
Work in layers of values before adding color. Paint your darks first with a dark neutral tone, then your midtones, then your lights. This approach (used in traditional painting) gives you a solid value structure that you can then tint with color. Easy Texture Paint's AO shadows give you the darkest recesses automatically, so you are starting from a good base.
Use a low brush strength (around 0.2 to 0.3) and build up coverage in multiple strokes. High-strength single strokes create harsh edges that are hard to blend. Slow build-up gives you smooth gradients that look much more natural, especially on organic surfaces like skin, wood, or fabric.
For hard-surface models like vehicles, machinery, or props, work on a higher resolution texture. The default resolution Easy Texture Paint creates is fine for preview but for final renders you want at least 2K, ideally 4K. You can adjust the texture resolution in the panel settings before running the one-click setup. Larger textures take more memory but the extra detail is worth it for close-up renders.
If your mesh has areas that are overlapping or tightly packed in the UV layout, you may get some paint bleed between surfaces. You can view the UV layout in the UV editor and manually adjust problem areas after the auto-unwrap. Easy Texture Paint's setup gives you a good starting point but UV editing is still a skill worth developing for complex meshes.
Combining Easy Texture Paint with Other Workflows
Texture painting sits in the middle of a lot of different Blender workflows and Easy Texture Paint connects well with several of them.
For stylized characters, texture painting is often the primary look-development tool. You paint the entire surface manually to get a hand-crafted, illustrative look that procedural shaders rarely achieve. Easy Texture Paint gets you into that painting mode faster and the AO bake gives you the depth cues that make flat-shaded stylized art readable as three-dimensional.
For game asset workflows, painted textures baked to a UV map are the standard output format. Easy Texture Paint's one-click UV setup produces a clean, non-overlapping UV map that works correctly with game engine importers. Once your painting is done you can bake other passes (normal maps, roughness) in Blender's bake panel and combine them for a full PBR texture set.
If you are also rigging and animating the characters you paint, the Shape Key Fixer addon handles the shape key management side of character work. The two addons are built for different parts of the character pipeline but they complement each other well on full character projects.
Frequently Asked Questions
Can I paint on meshes that already have a material set up?
Yes. If your mesh already has a principled BSDF material, Easy Texture Paint detects the existing material and adds a texture node to it rather than replacing the whole material. Your existing material settings (roughness, metallic values, etc.) are preserved and the new painted texture is connected to the Base Color input.
What resolution does the auto-generated texture use by default?
The default is 1024 x 1024 pixels, which is sufficient for viewport preview and simple renders. For production work you can change this in the panel settings before clicking One-Click UV Setup. Common choices are 2048 x 2048 for mid-resolution assets and 4096 x 4096 for hero assets that will be seen up close.
Does the AO bake update automatically when I change my mesh?
The AO bake is a one-time calculation that gets written into your texture. If you modify your mesh significantly after baking, the baked shadows will not match the new geometry. Run the AO bake again after major mesh changes to keep the texture accurate.
Can I use the painted texture in Cycles as well as EEVEE?
The painted texture is a standard image texture node in your material, so it works identically in both render engines. Cycles will produce more accurate lighting around the painted surface, while EEVEE renders faster. The painted texture itself is render-engine agnostic.
Get Easy Texture Paint and start texturing your models without the usual setup headache.
